Showing posts with label CSS 3. Show all posts

Friday, April 25, 2014

// // Leave a Comment

Social Buttons With Hover Effect for Blogger

Give your readers a chance to show you how much you care about the Blog desing, or how good your article is, to raise the social media likes.

You may also read my previous article about Css Animated Menu Widget for Blogger.


Live Demo 


Just Follow These Simple Steps


  • Go to Blogger Dashboard
  • click on your blog drop & down menu
  • Click layout >> Add a gadget >> Html/Javascript
  • Then paste the following code in Html box

<style>
.social-contain {
 float: left;
 margin-bottom: 20px;
 text-align: center;
 width: auto;
 }

ul#social {
 position: relative;
 margin:0 auto;
 }

ul#social li {
 float: left;
 margin-right: 2px;
 list-style:none;
 }

ul#social li:last-child {
 margin-right: 0;
 }

ul#social li a {
 display: block;
 }

.soc-fb {
 background: url(https://blogger.googleusercontent.com/img/b/R29vZ2xl/AVvXsEi9piCKRx_NM8BYP22dnNnMfthnupzmQKoKEP5PcvQ5hFtw4GuSdw9MhspyXQrVq3W8K_M43T9TUP9i2hvTwW873ngnOlEjrCP63RYEPU7-4Cv0Nu2G8kedIZJSR8WsL1XrAzAgoad5pbc/s1600/social-but.png) 0 0;
 position: relative;
 width: 58px;
 height: 58px;
 }

.soc-fb:hover {
 background: url(https://blogger.googleusercontent.com/img/b/R29vZ2xl/AVvXsEi9piCKRx_NM8BYP22dnNnMfthnupzmQKoKEP5PcvQ5hFtw4GuSdw9MhspyXQrVq3W8K_M43T9TUP9i2hvTwW873ngnOlEjrCP63RYEPU7-4Cv0Nu2G8kedIZJSR8WsL1XrAzAgoad5pbc/s1600/social-but.png) 0 -58px;
 }

.soc-twi {
 background: url(https://blogger.googleusercontent.com/img/b/R29vZ2xl/AVvXsEi9piCKRx_NM8BYP22dnNnMfthnupzmQKoKEP5PcvQ5hFtw4GuSdw9MhspyXQrVq3W8K_M43T9TUP9i2hvTwW873ngnOlEjrCP63RYEPU7-4Cv0Nu2G8kedIZJSR8WsL1XrAzAgoad5pbc/s1600/social-but.png) -58px 0;
 position: relative;
 width: 58px;
 height: 58px;
 }

.soc-twi:hover {
 background: url(https://blogger.googleusercontent.com/img/b/R29vZ2xl/AVvXsEi9piCKRx_NM8BYP22dnNnMfthnupzmQKoKEP5PcvQ5hFtw4GuSdw9MhspyXQrVq3W8K_M43T9TUP9i2hvTwW873ngnOlEjrCP63RYEPU7-4Cv0Nu2G8kedIZJSR8WsL1XrAzAgoad5pbc/s1600/social-but.png) -58px -58px;
 }

.soc-gp {
 background: url(https://blogger.googleusercontent.com/img/b/R29vZ2xl/AVvXsEi9piCKRx_NM8BYP22dnNnMfthnupzmQKoKEP5PcvQ5hFtw4GuSdw9MhspyXQrVq3W8K_M43T9TUP9i2hvTwW873ngnOlEjrCP63RYEPU7-4Cv0Nu2G8kedIZJSR8WsL1XrAzAgoad5pbc/s1600/social-but.png) -116px 0;
 position: relative;
 width: 58px;
 height: 58px;
 }

.soc-gp:hover {
 background: url(https://blogger.googleusercontent.com/img/b/R29vZ2xl/AVvXsEi9piCKRx_NM8BYP22dnNnMfthnupzmQKoKEP5PcvQ5hFtw4GuSdw9MhspyXQrVq3W8K_M43T9TUP9i2hvTwW873ngnOlEjrCP63RYEPU7-4Cv0Nu2G8kedIZJSR8WsL1XrAzAgoad5pbc/s1600/social-but.png) -116px -58px;
 }

.soc-pin {
 background: url(https://blogger.googleusercontent.com/img/b/R29vZ2xl/AVvXsEi9piCKRx_NM8BYP22dnNnMfthnupzmQKoKEP5PcvQ5hFtw4GuSdw9MhspyXQrVq3W8K_M43T9TUP9i2hvTwW873ngnOlEjrCP63RYEPU7-4Cv0Nu2G8kedIZJSR8WsL1XrAzAgoad5pbc/s1600/social-but.png) -174px 0;
 position: relative;
 width: 58px;
 height: 58px;
 }

.soc-pin:hover {
 background: url(https://blogger.googleusercontent.com/img/b/R29vZ2xl/AVvXsEi9piCKRx_NM8BYP22dnNnMfthnupzmQKoKEP5PcvQ5hFtw4GuSdw9MhspyXQrVq3W8K_M43T9TUP9i2hvTwW873ngnOlEjrCP63RYEPU7-4Cv0Nu2G8kedIZJSR8WsL1XrAzAgoad5pbc/s1600/social-but.png) -174px -58px;
 }

.soc-rss {
 background: url(https://blogger.googleusercontent.com/img/b/R29vZ2xl/AVvXsEi9piCKRx_NM8BYP22dnNnMfthnupzmQKoKEP5PcvQ5hFtw4GuSdw9MhspyXQrVq3W8K_M43T9TUP9i2hvTwW873ngnOlEjrCP63RYEPU7-4Cv0Nu2G8kedIZJSR8WsL1XrAzAgoad5pbc/s1600/social-but.png) -232px 0;
 position: relative;
 width: 58px;
 height: 58px;
 }

.soc-rss:hover {
 background: url(https://blogger.googleusercontent.com/img/b/R29vZ2xl/AVvXsEi9piCKRx_NM8BYP22dnNnMfthnupzmQKoKEP5PcvQ5hFtw4GuSdw9MhspyXQrVq3W8K_M43T9TUP9i2hvTwW873ngnOlEjrCP63RYEPU7-4Cv0Nu2G8kedIZJSR8WsL1XrAzAgoad5pbc/s1600/social-but.png) -232px -58px;
 }
</style><br />
<br />
<div class="social-contain">
<ul id="social">
<li><a class="soc-fb" href="#" target="_blank"></a></li>
<li><a class="soc-twi" href="#" target="_blank"></a></li>
<li><a class="soc-gp" href="#" target="_blank"></a></li>
<li><a class="soc-pin" href="#" target="_blank"></a></li>
<li><a class="soc-rss" href="#"></a></li>
</ul>
</div>

  • Save It.
You have done if you need more info please let me know i will help you.
Read More
// // Leave a Comment

Css Animated Menu Widget for Blogger

Blog navigate is very important. Readers loves to stay those blog that's have easy navigate Menu and if you put cool CSS Animated Menu to your blogger its attract the user mind totally in your blog.

You also read my previous article about Simple settings for Firefox and Internet Explorer on Blogger

Let's see how to add CSS Animated Menu in Blogger


Just Follow These Simple Steps

  • Go to Blogger Dashboard
  • Click on Drop & Down Menu of your blog
  • Click layout >> and click Add a Gadget >> Html/Javascript 
  • Then paste the below code on it

<style>
#fbt-nav {margin:0 auto;list-style: none;width: 965px;height: 86px;overflow-y: hidden;}
#fbt-nav li {float: left;}
#fbt-nav li a {display: block;color: white;width: 120px;height: 61px;margin-top: 24px;text-decoration: none;text-align: center;}
#fbt-nav li a span.aname {font: bold 17px/61px "Arial";color: #fff;text-transform: uppercase;cursor: pointer;position: relative;top: 0;transition: top .5s ease;text-shadow: 1px 1px 1px rgba(0, 0, 0, 0.5);}
#fbt-nav li a img {position: relative;top: 0;transition: top .5s ease;}
#fbt-nav li a:hover {cursor: pointer;}
#fbt-nav li a:hover img {top: -85px;}
#fbt-nav li a:hover .aname {top: 85px;}
#fbt-nav li:nth-child(1) a {background: #150517;border-radius: 5px 0 0 5px;}
#fbt-nav li:nth-child(2) a {background: #3E3535;}
#fbt-nav li:nth-child(3) a {background: #4A4344;}
#fbt-nav li:nth-child(4) a {background: #595454;}
#fbt-nav li:nth-child(5) a {background: #616D7E;}
#fbt-nav li:nth-child(6) a {background: #5E5A80;}
#fbt-nav li:nth-child(7) a {background: #2B60DE;}
#fbt-nav li:nth-child(8) a {background: #38ACEC;border-radius: 0 5px 5px 0;}
</style>

<div id="fbt-nav">
<li> <a href="/"><span class="aname">Homepage</span> <img src="http://icons.iconarchive.com/icons/oxygen-icons.org/oxygen/48/Places-user-home-icon.png" /> </a> </li>

<li> <a href="#"> <span class="aname">Archive</span> <img src="http://icons.iconarchive.com/icons/kearone/comicons/48/zip-software-icon.png" /> </a> </li>

<li> <a href="#"> <span class="aname">About me</span> <img src="http://icons.iconarchive.com/icons/aha-soft/standard-portfolio/48/About-icon.png" /> </a> </li>

<li> <a href="#"> <span class="aname">Our Blog</span> <img src="http://icons.iconarchive.com/icons/scoyo/badge/48/My-Blog-icon.png" /> </a> </li>

<li> <a href="#"><span class="aname">Science</span> <img src="http://icons.iconarchive.com/icons/iconshock/real-vista-education/48/technology-icon.png" /> </a> </li>

<li> <a href="#"><span class="aname"> Sports  </span> <img src="http://icons.iconarchive.com/icons/itzikgur/my-seven/48/Games-Soccer-icon.png" /> </a> </li>

<li> <a href="#"><span class="aname">Photos</span> <img src="http://icons.iconarchive.com/icons/apathae/satellite/48/2-Pictures-icon.png" /> </a> </li>

<li> <a href="#"> <span class="aname">Contact</span> <img src="http://icons.iconarchive.com/icons/deleket/soft-scraps/48/Email-Download-icon.png" /> </a> </li>
</div>
  • Then Click Save
  • View Your blog.
You have done!

If you need more help please hit a comment below i will reply you by same :)
Read More

Saturday, January 11, 2014

// // 5 comments

Customize Label Widget In Blogger With Beautiful Style CSS3

Today i am going to share how to customize label widget in blogger with beautiful style.

You may also read my previous articles to make your blogger stylify.

Read This: Multi colored random posts Widget for Blogger

Read This: Add Multipul Related Post Widget & LinkWithin For Blogger

Customize Label Widget In Blogger With Beautiful Style CSS3

Just follow These Steps:

  • Go To Blogger >> Layout >> Add a Gadget
  • Choose "Labels" Widget.
  • Make Settings Like The Below Image & "Save" It.

Customize Label Widget In Blogger With Beautiful Style CSS3

Now the widget has been added into the blog and let's customize the label cloud widget.

Step 2. Customizing Labels Cloud Widget

  • Go To Blogger >> Template >> Backup Your Template
  • Click Edit HTMl and Find For ]]></b:skin>
  • Copy and Paste The Following Code Above ]]></b:skin>

/* Flat UI Labels Cloud By Www.Tonyisright.blogspot.Com ---------------- */
.sidebar .label-size {
  position:relative;
  text-transform: uppercase;
  text-decoration:none;
  font-size:13px;
  font-family:Open Sans;
  color:#fff!important;
  }
.sidebar .label-size a {
  color:#fff!important;
  font-weight:bold;
  padding:8px 10px;
  margin:0 6px 6px 0;
  float:left;
  display:block;
  -moz-transition: all 0.4s ;
  -o-transition: all 0.4s;
  -webkit-transition: all 0.4s ;
  -ms-transition: all 0.4s ;
  transition: all 0.4s ;
}
.sidebar .label-size-1 a {background:#1abc9c;border-bottom:3px solid #127F69;}
.sidebar .label-size-1 a:hover {background:#16a085;}
.sidebar .label-size-2 a {background:#3498db;border-bottom:3px solid #226693;}
.sidebar .label-size-2 a:hover {background:#2980b9;}
.sidebar .label-size-3 a {background:#2ecc71;border-bottom:3px solid #1F8C4C;}
.sidebar .label-size-3 a:hover {background:#27ae60}
.sidebar .label-size-4 a {background:#9b59b6;border-bottom:3px solid #74398E;}
.sidebar .label-size-4 a:hover {background:#8e44ad}
.sidebar .label-size-5 a {background:#e74c3c;border-bottom:3px solid #922C20;}
.sidebar .label-size-5 a:hover {background:#c0392b}

You have done.

Final Words

Now you have done i you enjoy this article please share this with your friends and stay tuned more interesting articles ae waiting for you if you need any help please feel free to contact us or leave a comment below will reply will be highly appreciate thanks.
Read More

Friday, November 22, 2013

// // Leave a Comment

Add Css Social Widget In Blogger

Add Css Social Widget In Blogger
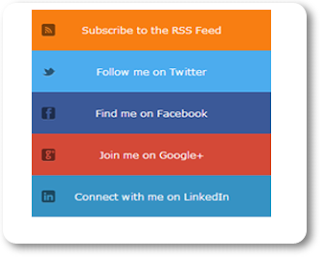
Hi Friends,In this Post i m sharing this css Social widget with hower effect for blogger.Hope you like this widget.This css widget is very cool and stylish.itcontains all the social links like: facebook,twitter,Google+,LinkedIn,Rss feeds,I'm sure that this will tempt your readers to have a look at on your social links.Now,Hurry up add this widget in your blog. Its very easy. just follow the below steps one by one.


How To Add Css Social Widget In Blogger 


  • First for All Go To Blogger.com > Page Elements > Add a Gadget
  • Choose HTML/JavaScript from the list of the gadgets
  • Copy and paste the code below in the content box. 

 <style type="text/css">
.btnt-chronicl-social {  width: 320px;  margin: -10px;  }
.btnt-chronicl-social ul {  margin: 0;  padding: 0;  }
.btnt-chronicl-social ul li {  list-style:none;   padding: 0; text-transform: none; }
.btnt-chronicl-social ul li a {   color: #fff;   display:block;  }
.btnt-chronicl-social ul li a:hover {  color: #c9c9c9;  background-color: #333;   }
.btnt-chronicl-social ul li .rss { background: url("http://i1203.photobucket.com/albums/bb382/chandeep10/social-icons/RSS-1.png") no-repeat scroll 10px center #F87E12; background-size: 20px; padding: 17.5px 45px; }
.btnt-chronicl-social ul li .twitter { background: url("http://i1203.photobucket.com/albums/bb382/chandeep10/social-icons/Twitter.png") no-repeat scroll 10px center #4CACEE; background-size: 20px; padding: 17.5px 45px;}
.btnt-chronicl-social ul li .facebook { background: url("http://i1203.photobucket.com/albums/bb382/chandeep10/social-icons/Facebook-1.png") no-repeat scroll 10px center #3B5998; background-size: 20px; padding: 17.5px 45px; }
.btnt-chronicl-social ul li .google { background: url("http://i1203.photobucket.com/albums/bb382/chandeep10/social-icons/google.png") no-repeat scroll 10px center #D44937; background-size: 20px; padding: 17.5px 45px; }
.btnt-chronicl-social ul li .linkedin { background: url("http://i1203.photobucket.com/albums/bb382/chandeep10/social-icons/LinkedIn-1.png") no-repeat scroll 10px center #3692C3; background-size: 20px; padding: 17.5px 45px; }
</style>
<div class="btnt-chronicl-social">
<ul>
<li><a class="rss" href="http://feeds.feedburner.com/Tonysblaster">Subscribe to the RSS Feed</a></li>
<li><a class="twitter" href="https://twitter.com/Infoblogmaz">Follow me on Twitter</a></li>
<li><a class="facebook" href="https://www.facebook.com/Infoblogmaz">Find me on Facebook</a></li>
<li><a class="google" href="https://plus.google.com/Tonyisrightblogspot">Join me on Google+</a></li>
<li><a class="linkedin" href="http://in.linkedin.com/in/YourUserName">Connect with me on LinkedIn</a></li>
</ul>
</div>

Change all Red words with your Url's.


Replace Tonysblaster with your feedburner Feed ID
Replace Infoblogmaz with your facebook Page ID
Replace Infoblogmaz with your twitter ID
Replace https://plus.google.com/TonyisrightBlogspot with your Google+ ID
Replace http://in.linkedin.com/in/YourUserName with your Linkedin URL

Well Done!

If need any further information please feel free to leave a comment below your reply will highly appreciate.
Read More